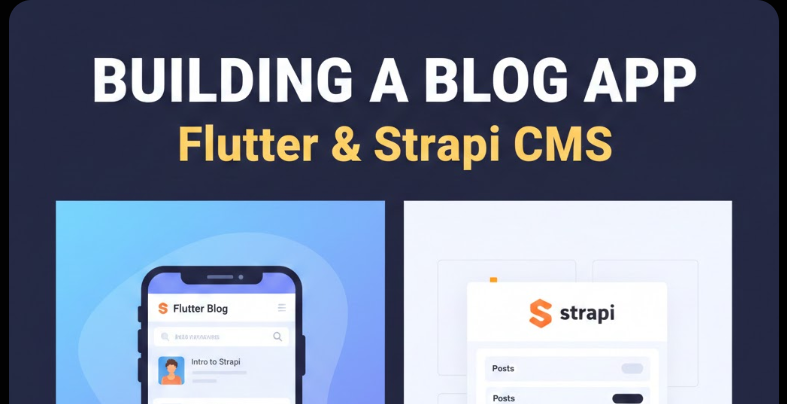
Building a Flutter blog app with Strapi CMS
Software Engineering End to End ProjectsPosted by tintin_2003 on 2026-01-28 20:00:16 |
Share: Facebook | Twitter | Whatsapp | Linkedin Visits: 186
Building a Complete Blog-Sharing Application: Connecting Flutter with Strapi CMS
Introduction: The Rise of Headless CMS Architecture
In the evolving landscape of modern web and mobile development, the traditional monolithic Content Management Systems (CMS) like WordPress or Drupal are gradually giving way to a new paradigm: headless CMS architecture. But what exactly is a headless CMS, and why has it become the preferred choice for contemporary applications?
A headless CMS is a backend-only content management system that stores and delivers content through APIs, without dictating how or where that content is displayed. Unlike traditional CMS platforms that tightly couple the content repository with the presentation layer (the "head"), a headless CMS decouples these concerns entirely. This separation allows developers to use any frontend technology—be it React, Vue, Angular, Flutter, React Native, or even IoT devices—to consume and display content.
Why Modern Applications Prefer Headless Architecture
The shift toward headless CMS platforms is driven by several compelling factors:
Omnichannel Content Delivery: Today's users consume content across multiple devices and platforms—mobile apps, web applications, smartwatches, voice assistants, and more. A headless CMS enables you to create content once and deliver it everywhere through APIs, ensuring consistency across all touchpoints.
Developer Freedom: Frontend developers can use their preferred frameworks and tools without being constrained by the CMS's templating system. Backend developers can focus on content modeling and API optimization independently.
Performance and Scalability: By separating concerns, headless architectures enable better caching strategies, CDN integration, and horizontal scaling. The frontend can be optimized independently of the backend, resulting in faster, more responsive applications.
Future-Proof Architecture: As new platforms and devices emerge, a headless CMS makes it easy to extend your content delivery without redesigning your entire system.
Enhanced Security: With no presentation layer attached to the CMS, the attack surface is significantly reduced. The admin panel and content repository can be kept completely separate from public-facing applications.
Enter Strapi: The Leading Open-Source Headless CMS
Among the growing ecosystem of headless CMS platforms, Strapi has emerged as a particularly compelling choice for developers. Strapi is an open-source, Node.js-based headless CMS that provides a flexible, developer-friendly approach to content management. It bridges the gap between the flexibility developers need and the user-friendly interface content editors expect.
Strapi powers a diverse range of real-world applications:
- Content-Driven Mobile Apps: News applications, magazine apps, and content aggregators that need to deliver rich, structured content to mobile devices
- Corporate Websites and Blogs: Companies like Toyota, IBM, and NASA have used Strapi for their content management needs
- E-commerce Platforms: Product catalogs, inventory management, and content marketing systems
- Multi-Platform Publishing: Systems that deliver content to web, mobile, smart TVs, and other connected devices
- API-First Applications: Startups and enterprises building modern, scalable applications with microservices architecture
What We'll Build Together
In this comprehensive guide, we'll walk through building a complete blog-sharing application using Flutter for the mobile frontend and Strapi as our headless CMS backend. This isn't just a simple tutorial—it's a deep dive into modern application architecture that will take you from beginner concepts to advanced implementation strategies.
By the end of this guide, you'll have built a fully functional blog platform where:
- Users can browse and read blog posts
- Content is dynamically fetched from Strapi
- Authors can manage their content through Strapi's admin panel
- Posts can be categorized, searched, and filtered
- Users can share content across social platforms
- Images and media are efficiently handled
- The application is ready for production deployment
Whether you're a mobile developer looking to add CMS capabilities to your apps, or a backend developer exploring modern content delivery solutions, this guide will provide you with practical, production-ready knowledge.
Let's begin our journey into the world of headless CMS and modern application development.
Understanding Strapi CMS in Depth
Before we dive into building our application, let's develop a thorough understanding of Strapi, its capabilities, and why it's an excellent choice for our blog-sharing platform.
What is Strapi?
Strapi is a leading open-source headless CMS built entirely with JavaScript (Node.js). First released in 2015 and reaching production maturity in 2018, Strapi has grown to become one of the most popular headless CMS solutions, with over 50,000 stars on GitHub and hundreds of thousands of developers worldwide using it in production.
Unlike traditional CMS platforms that provide a complete solution including templates and frontend rendering, Strapi focuses exclusively on:
- Content modeling and management
- API generation (REST and GraphQL)
- User authentication and authorization
- Media library management
- Admin panel for content editors
Core Features and Capabilities
1. Open-Source and Self-Hosted
Strapi is 100% open-source under the MIT license, giving you complete control over your data and deployment. You can host it anywhere—on your own servers, cloud platforms like AWS, DigitalOcean, Heroku, or even Docker containers. There's no vendor lock-in, and you own your content completely.
2. Database Flexibility
Strapi supports multiple database systems out of the box:
- SQLite: Perfect for development and prototyping
- PostgreSQL: Recommended for production, offers advanced features and excellent performance
- MySQL/MariaDB: Widely supported and reliable
- MongoDB: For those preferring NoSQL solutions (though SQL databases are recommended)
This flexibility means you can start with SQLite during development and seamlessly migrate to PostgreSQL or MySQL for production.
3. Automatic API Generation
One of Strapi's most powerful features is automatic API generation. When you create a content type (like "Blog Post" or "Author"), Strapi automatically generates:
- RESTful API endpoints for CRUD operations (Create, Read, Update, Delete)
- GraphQL API (optional) for flexible, efficient queries
- Built-in filtering, sorting, and pagination
- Population of relations and nested data
This means you can define your content structure and immediately start consuming it via APIs—no manual endpoint creation required.
4. Customizable Admin Panel
Strapi provides a modern, intuitive admin dashboard where content editors can:
- Create, edit, and delete content
- Upload and manage media files
- Configure content types and relationships
- Manage users and permissions
- Monitor API usage and performance
The admin panel is built with React and can be customized or extended with plugins.
5. Robust Authentication and Authorization
Strapi includes a complete authentication system with:
- JWT (JSON Web Token) based authentication
- Role-based access control (RBAC)
- Granular permissions at the content-type and field level
- Support for third-party authentication providers (OAuth, SSO)
- API token management for service-to-service communication
6. Plugin Ecosystem
Strapi's plugin architecture allows you to extend functionality with:
- Official plugins (GraphQL, i18n, Email, Upload providers)
- Community plugins
- Custom plugins you build yourself
7. Internationalization (i18n)
Built-in support for managing content in multiple languages, perfect for global applications.
8. Media Library
A powerful media management system with support for:
- Image, video, and document uploads
- Multiple storage providers (local, AWS S3, Cloudinary, etc.)
- Automatic image optimization and transformation
- Asset organization with folders
Why Strapi for a Blog-Sharing Application?
Compared to traditional CMS platforms like WordPress or Ghost, Strapi offers several advantages for building a blog-sharing application:
1. True API-First Architecture: WordPress's REST API was added later and can be clunky. Strapi was designed as an API-first platform from day one, making it naturally suited for mobile applications.
2. Flexibility Without Constraints: You're not locked into PHP, themes, or specific frontend frameworks. Use Flutter, React Native, or any technology you prefer.
3. Superior Performance: Since there's no server-side rendering or template processing, APIs respond faster. You can implement aggressive caching strategies on both backend and frontend.
4. Modern Developer Experience: Built with modern JavaScript (Node.js), uses npm packages, supports Docker, and integrates seamlessly with modern development workflows.
5. Scalability: Designed for horizontal scaling, works well with load balancers, and separates concerns cleanly.
6. Cost-Effective: Being open-source and self-hosted, there are no licensing fees. You only pay for your hosting infrastructure.
7. Content Modeling Freedom: Create exactly the content structure you need without being constrained by predefined post types or taxonomies.
Project Overview: What We're Building
Let's clearly define our project scope, architecture, and objectives before we start coding.
Project Goal
We're building a mobile blog-sharing application that allows:
- Readers to browse, read, and share blog posts
- Authors to publish and manage their content through Strapi's admin panel
- Administrators to moderate content, manage users, and configure the platform
The application will be a native mobile experience built with Flutter, consuming content from a Strapi backend via REST APIs.
Key Features
Our blog-sharing application will include:
Core Features:
- Home screen with latest blog posts
- Blog detail page with full content
- Author profile pages
- Category-based filtering
- Search functionality
- Social media sharing
- Image display and optimization
Content Management (via Strapi Admin):
- Create and edit blog posts
- Manage authors and profiles
- Organize content with categories and tags
- Upload and manage featured images
- Schedule publish dates
User Experience Features:
- Pull-to-refresh for new content
- Infinite scroll pagination
- Offline reading (cached content)
- Responsive image loading
- Share links via native sharing
Optional Advanced Features:
- Bookmark favorite posts
- Like/reaction system
- Comments (with moderation)
- User authentication
- Push notifications for new posts
System Architecture
Our application follows a modern, decoupled architecture:
┌─────────────────────────────────────────────────────────┐
│                    Flutter Mobile App                    │
│  ┌──────────────────────────────────────────────────┐  │
│  │         Presentation Layer (UI Widgets)          │  │
│  └──────────────────────────────────────────────────┘  │
│  ┌──────────────────────────────────────────────────┐  │
│  │     Business Logic Layer (State Management)      │  │
│  └──────────────────────────────────────────────────┘  │
│  ┌──────────────────────────────────────────────────┐  │
│  │       Data Layer (API Client & Models)           │  │
│  └──────────────────────────────────────────────────┘  │
└─────────────────────────────────────────────────────────┘
                           │
                           │ HTTP/HTTPS
                           │ REST API Calls
                           ▼
┌─────────────────────────────────────────────────────────┐
│                    Strapi Backend                        │
│  ┌──────────────────────────────────────────────────┐  │
│  │              REST API Endpoints                   │  │
│  └──────────────────────────────────────────────────┘  │
│  ┌──────────────────────────────────────────────────┐  │
│  │         Content-Type Controllers & Services      │  │
│  └──────────────────────────────────────────────────┘  │
│  ┌──────────────────────────────────────────────────┐  │
│  │              Authentication Layer                 │  │
│  └──────────────────────────────────────────────────┘  │
│  ┌──────────────────────────────────────────────────┐  │
│  │         Database (PostgreSQL/MySQL)               │  │
│  └──────────────────────────────────────────────────┘  │
└─────────────────────────────────────────────────────────┘
                           │
                           │
                           ▼
┌─────────────────────────────────────────────────────────┐
│              Media Storage (Local/S3/CDN)                │
└─────────────────────────────────────────────────────────┘
Data Flow
Understanding how data flows through the system is crucial:
Content Creation Flow:
- Author logs into Strapi admin panel
- Creates/edits blog post with content, images, categories
- Publishes post (or saves as draft)
- Strapi stores content in database
- Uploads media files to storage
- API endpoints become immediately available
Content Consumption Flow:
- Flutter app makes HTTP request to Strapi API
- Strapi validates permissions and authentication (if required)
- Queries database for requested content
- Formats response as JSON
- Returns data to app
- Flutter app parses JSON and updates UI
- Images are loaded from media URLs
User Interaction Flow:
- User taps on a blog post
- App fetches full post data via API
- Displays content with images and formatting
- User can share via native share sheet
- Analytics tracked (if implemented)
Content Model Structure
Our blog application will use the following content types:
Blog Post:
- Title (text)
- Slug (unique identifier)
- Content (rich text)
- Excerpt (short description)
- Featured Image (media)
- Publish Date (datetime)
- Author (relation to Author)
- Categories (relation to Category)
- Tags (relation to Tag)
- Status (published/draft)
- View Count (number)
Author:
- Name (text)
- Bio (rich text)
- Profile Picture (media)
- Email (email)
- Social Links (JSON or component)
- Posts (relation to Blog Post)
Category:
- Name (text)
- Slug (text)
- Description (text)
- Icon/Image (media)
- Posts (relation to Blog Post)
Tag:
- Name (text)
- Slug (text)
Technology Stack
Backend:
- Strapi v4 (latest stable)
- Node.js 16+
- PostgreSQL (production) or SQLite (development)
- PM2 (process management for production)
Frontend:
- Flutter 3.x
- Dart 3.x
- http or dio package (API client)
- cached_network_image (image caching)
- share_plus (native sharing)
- State management (Provider, Riverpod, or Bloc)
Development Tools:
- Postman (API testing)
- Git (version control)
- Docker (optional containerization)
Production Infrastructure:
- Cloud hosting (AWS, DigitalOcean, Heroku)
- CDN for media files (Cloudinary, AWS S3)
- SSL certificates (Let's Encrypt)
Now that we have a clear picture of what we're building, let's start with the hands-on implementation.
Setting Up Strapi CMS: Step-by-Step Guide
Let's set up our Strapi backend from scratch. This section will walk you through every step of installation, configuration, and content type creation.
Prerequisites
Before we begin, ensure you have the following installed:
- Node.js: Version 16.x or 18.x (LTS versions recommended)
- npm or yarn: Package managers (comes with Node.js)
- Database (optional for production): PostgreSQL or MySQL
- Code Editor: VS Code, WebStorm, or your preferred IDE
You can verify your Node.js installation:
node --version
npm --version
Step 1: Installing Strapi
Strapi provides a quick-start command that sets up a new project with all dependencies. Open your terminal and run:
npx create-strapi-app@latest blog-backend
During installation, you'll be prompted with several options:
? Choose your installation type: (Use arrow keys)
  Quickstart (recommended)
  Custom (manual settings)
For development: Choose "Quickstart" - this will use SQLite, which is perfect for getting started quickly.
For production setup: Choose "Custom" to configure PostgreSQL or MySQL from the start.
The installation process will:
- Create a new directory called
blog-backend - Install all necessary dependencies
- Set up the database
- Configure the admin panel
- Start the development server
This process typically takes 2-5 minutes depending on your internet connection.
Step 2: First Launch and Admin Setup
Once installation completes, Strapi will automatically open in your browser at http://localhost:1337/admin. If it doesn't open automatically, navigate to this URL manually.
You'll be greeted with an admin registration form. This is your super admin account:
- First Name: Your Name
- Last Name: Your Last Name
- Email: your.email@example.com
- Password: (strong password, minimum 8 characters)
Important: Store these credentials securely. This is the master account for your CMS.
After registration, you'll be taken to the Strapi admin dashboard—a clean, modern interface where you'll manage all your content.
Step 3: Understanding the Strapi Admin Panel
Let's familiarize ourselves with the admin panel structure:
Main Navigation (left sidebar):
- Content Manager: Where you create and edit content
- Content-Type Builder: Define your data structures
- Media Library: Upload and manage images/files
- Plugins: Extend Strapi's functionality
- Settings: Configure roles, permissions, and more
Take a moment to explore each section. The interface is intuitive and well-organized.
Step 4: Configuring the Database (Production Setup)
If you're setting up for production or want to use PostgreSQL from the start, you'll need to configure the database connection.
For PostgreSQL:
First, install the PostgreSQL client:
npm install pg --save
Then edit config/database.js:
module.exports = ({ env }) => ({
  connection: {
    client: 'postgres',
    connection: {
      host: env('DATABASE_HOST', 'localhost'),
      port: env.int('DATABASE_PORT', 5432),
      database: env('DATABASE_NAME', 'strapi_blog'),
      user: env('DATABASE_USERNAME', 'strapi'),
      password: env('DATABASE_PASSWORD', 'your_password'),
      ssl: env.bool('DATABASE_SSL', false) && {
        rejectUnauthorized: env.bool('DATABASE_SSL_SELF', false),
      },
    },
    debug: false,
  },
});
Create a .env file in your project root:
DATABASE_HOST=localhost
DATABASE_PORT=5432
DATABASE_NAME=strapi_blog
DATABASE_USERNAME=strapi
DATABASE_PASSWORD=your_secure_password
DATABASE_SSL=false
For MySQL:
Install the MySQL client:
npm install mysql --save
Update config/database.js:
module.exports = ({ env }) => ({
  connection: {
    client: 'mysql',
    connection: {
      host: env('DATABASE_HOST', 'localhost'),
      port: env.int('DATABASE_PORT', 3306),
      database: env('DATABASE_NAME', 'strapi_blog'),
      user: env('DATABASE_USERNAME', 'strapi'),
      password: env('DATABASE_PASSWORD', 'your_password'),
      ssl: env.bool('DATABASE_SSL', false),
    },
  },
});
After configuration, restart Strapi:
npm run develop
Step 5: Creating Content Types
Now for the exciting part—defining our content structure. We'll create four content types: Blog, Author, Category, and Tag.
Creating the Author Content Type
- Click on Content-Type Builder in the left sidebar
- Click "Create new collection type"
- Enter display name:
Author - Click Continue
Now add fields:
Name Field:
- Click "Add another field"
- Select Text
- Name:
name - Type: Short text
- Click Advanced Settings
- Check "Required field"
- Check "Unique field"
- Click Finish
Bio Field:
- Add field → Rich Text
- Name:
bio - Click Finish
Email Field:
- Add field → Email
- Name:
email - Advanced Settings → Check "Required field"
- Click Finish
Profile Picture:
- Add field → Media
- Name:
profilePicture - Type: Single media
- Allowed types: Images
- Click Finish
Social Links (optional):
- Add field → JSON
- Name:
socialLinks - Click Finish
Click Save to create the Author content type.
Creating the Category Content Type
- Content-Type Builder → Create new collection type
- Display name:
Category - Add fields:
Name:
- Text (Short text)
- Required, Unique
Slug:
- UID (auto-generated from name)
- Attached to "name" field
Description:
- Text (Long text)
Icon/Image:
- Media (Single media, Images only)
Click Save.
Creating the Tag Content Type
- Create new collection type:
Tag - Add fields:
Name:
- Text (Short text)
- Required, Unique
Slug:
- UID (from name)
Click Save.
Creating the Blog Content Type
This is our main content type and will have the most fields:
- Create new collection type:
Blog - Add these fields:
Title:
- Text (Short text)
- Required, Unique
Slug:
- UID (from title)
Content:
- Rich Text
- Required
Excerpt:
- Text (Long text)
- Description: "Short description for preview"
Featured Image:
- Media (Single media, Images only)
- Required
Publish Date:
- DateTime
- Default: Current date and time
Status:
- Enumeration
- Values:
draft,published - Default:
draft
View Count:
- Number (integer)
- Default: 0
Now for the relationships:
Author Relation:
- Add field → Relation
- Configure: Blog belongs to one Author
- Author has many Blogs
- Name it
authoron Blog side
Categories Relation:
- Add field → Relation
- Configure: Blog has and belongs to many Category
- Name it
categories
Tags Relation:
- Add field → Relation
- Configure: Blog has and belongs to many Tag
- Name it
tags
Click Save.
Strapi will rebuild the admin panel (this takes about 30 seconds). Once complete, you'll see all your content types appear in the Content Manager.
Step 6: Adding Sample Content
Let's add some sample data to test our setup:
Create Authors:
- Go to Content Manager → Author
- Click "Create new entry"
- Fill in:
- Name: John Doe
- Email: john@example.com
- Bio: "Passionate tech writer and developer"
- Upload a profile picture
- Click Save and Publish
Create 2-3 more authors.
Create Categories:
- Content Manager → Category
- Create entries:
- Name: "Technology" (slug auto-generates: technology)
- Description: "Latest tech news and trends"
- Name: "Tutorial" (slug: tutorial)
- Name: "Opinion" (slug: opinion)
- Save and Publish each
Create Tags:
Create several tags: "Flutter", "Mobile Development", "JavaScript", "Node.js", "API", "Backend"
Create Blog Posts:
- Content Manager → Blog
- Click "Create new entry"
- Fill in all fields:
- Title: "Getting Started with Flutter Development"
- Content: (Add rich text content)
- Excerpt: "Learn the basics of Flutter..."
- Featured Image: Upload an image
- Author: Select an author
- Categories: Select one or more categories
- Tags: Add relevant tags
- Status: Select "published"
- Click Save and Publish
Create 5-10 blog posts with varied content to have good test data.
Step 7: Configuring Server Settings
Let's configure some important server settings:
Server Configuration (config/server.js):
module.exports = ({ env }) => ({
  host: env('HOST', '0.0.0.0'),
  port: env.int('PORT', 1337),
  app: {
    keys: env.array('APP_KEYS'),
  },
  url: env('PUBLIC_URL', 'http://localhost:1337'),
  webhooks: {
    populateRelations: env.bool('WEBHOOKS_POPULATE_RELATIONS', false),
  },
});
Middleware Configuration (config/middlewares.js):
We need to configure CORS to allow our Flutter app to access the API:
module.exports = [
  'strapi::errors',
  {
    name: 'strapi::security',
    config: {
      contentSecurityPolicy: {
        useDefaults: true,
        directives: {
          'connect-src': ["'self'", 'https:'],
          'img-src': [
            "'self'",
            'data:',
            'blob:',
            'dl.airtable.com',
            'strapi.io',
          ],
          'media-src': [
            "'self'",
            'data:',
            'blob:',
          ],
          upgradeInsecureRequests: null,
        },
      },
    },
  },
  {
    name: 'strapi::cors',
    config: {
      enabled: true,
      origin: ['*'], // In production, specify your app's domain
      methods: ['GET', 'POST', 'PUT', 'DELETE', 'OPTIONS', 'HEAD'],
      headers: ['Content-Type', 'Authorization', 'Origin', 'Accept'],
      keepHeaderOnError: true,
    },
  },
  'strapi::poweredBy',
  'strapi::logger',
  'strapi::query',
  'strapi::body',
  'strapi::session',
  'strapi::favicon',
  'strapi::public',
];
Important: For production, replace origin: ['*'] with your actual app domain or API gateway URL.
Step 8: Testing the API
Before connecting our Flutter app, let's verify that the API is working correctly.
Start your Strapi server if it's not running:
npm run develop
Open your browser or Postman and test these endpoints:
Get all blogs:
GET http://localhost:1337/api/blogs
You should see an error because we haven't configured permissions yet! This is expected and leads us to the next crucial section.
Managing Roles, Permissions, and Authentication
Security and access control are critical aspects of any CMS. Let's configure how our API can be accessed.
Understanding Strapi's Permission System
Strapi implements a powerful Role-Based Access Control (RBAC) system with:
Two Default Roles:
- Public: Unauthenticated users (your app users)
- Authenticated: Logged-in users
Permission Levels:
- Find: Get all entries (list)
- FindOne: Get a single entry by ID
- Create: Create new entries
- Update: Modify existing entries
- Delete: Remove entries
Scope:
- Permissions can be set per content-type
- Can be set per API endpoint
- Can include field-level permissions
Configuring Public Access
For our blog application, we want anyone to be able to read blogs, but only authenticated users (authors) should create or edit content.
- Go to Settings (left sidebar, bottom)
- Under Users & Permissions Plugin, click Roles
- Click on Public role
You'll see all your content types listed. For each content type, expand it to see available permissions.
For Blog:
- ✅ Check
find(allows getting list of blogs) - ✅ Check
findOne(allows getting single blog) - ❌ Leave
create,update,deleteunchecked
For Author:
- ✅ Check
find - ✅ Check
findOne
For Category:
- ✅ Check
find - ✅ Check
findOne
For Tag:
- ✅ Check
find - ✅ Check
findOne
Click Save in the top right.
Now test the API again:
GET http://localhost:1337/api/blogs
You should receive a JSON response with your blog posts!
Understanding API Response Structure
Strapi v4 uses a specific response format:
{
  "data": [
    {
      "id": 1,
      "attributes": {
        "title": "Getting Started with Flutter",
        "slug": "getting-started-with-flutter",
        "content": "...",
        "excerpt": "...",
        "publishDate": "2024-01-15T10:00:00.000Z",
        "status": "published",
        "viewCount": 0,
        "createdAt": "2024-01-15T09:00:00.000Z",
        "updatedAt": "2024-01-15T09:30:00.000Z"
      }
    }
  ],
  "meta": {
    "pagination": {
      "page": 1,
      "pageSize": 25,
      "pageCount": 1,
      "total": 1
    }
  }
}
Populating Relations
By default, relations (like author, categories) are not included in responses. You need to explicitly request them using the populate parameter.
Get blogs with author:
GET http://localhost:1337/api/blogs?populate=author
Get blogs with all relations:
GET http://localhost:1337/api/blogs?populate=*
Get blogs with nested relations:
GET http://localhost:1337/api/blogs?populate[author][populate]=profilePicture&populate=categories&populate=tags&populate=featuredImage
This deeply nested populate syntax can get complex. We'll handle this elegantly in our Flutter code.
Configuring Authenticated Access
For content creation, we need authentication. Let's set up the Authenticated role:
- Settings → Roles → Authenticated
- For Blog:
- ✅ Check all:
find,findOne,create,update,delete
- ✅ Check all:
This allows logged-in users to manage blog content.
Setting Up API Tokens (Service-to-Service Authentication)
For administrative tasks or automation, you might want to use API tokens instead of user authentication.
- Settings → API Tokens
- Click Create new API Token
- Name: "Mobile App Token"
- Token type: Read-only or Full access
- Click Save
Copy the generated token immediately—it won't be shown again!
Use this token in requests:
GET http://localhost:1337/api/blogs
Authorization: Bearer YOUR_API_TOKEN_HERE
Implementing User Registration and Login
If you want users to authenticate (for features like bookmarks, comments), you'll use Strapi's authentication endpoints:
Register:
POST http://localhost:1337/api/auth/local/register
Content-Type: application/json

{
  "username": "johndoe",
  "email": "john@example.com",
  "password": "SecurePassword123"
}
Login:
POST http://localhost:1337/api/auth/local
Content-Type: application/json

{
  "identifier": "john@example.com",
  "password": "SecurePassword123"
}
Response includes a JWT token:
{
  "jwt": "eyJhbGciOiJIUzI1NiIsInR5cCI6IkpXVCJ9...",
  "user": {
    "id": 1,
    "username": "johndoe",
    "email": "john@example.com",
    "confirmed": true,
    "blocked": false
  }
}
Use this JWT in subsequent authenticated requests:
GET http://localhost:1337/api/blogs
Authorization: Bearer JWT_TOKEN_HERE
Field-Level Permissions
Strapi also supports hiding specific fields from public access. For example, you might want to hide author email addresses:
- Settings → Roles → Public
- Expand Author content type
- Click on
findOnepermission - In the modal, you'll see "Field permissions"
- Uncheck
email - Save
Now when you fetch authors, the email field won't be included in the response.
Connecting Flutter App with Strapi: API Integration
Now that our Strapi backend is fully configured, let's build the Flutter application and connect it to our CMS.
Setting Up the Flutter Project
Create a new Flutter project:
flutter create blog_app
cd blog_app
Installing Dependencies
Edit pubspec.yaml and add these dependencies:
dependencies:
  flutter:
    sdk: flutter

  # HTTP client for API calls
  http: ^1.1.0

  # Image caching
  cached_network_image: ^3.3.0

  # State management
  provider: ^6.1.1

  # URL launcher for external links
  url_launcher: ^6.2.1

  # Share functionality
  share_plus: ^7.2.1

  # Intl for date formatting
  intl: ^0.18.1

  # Shimmer loading effect
  shimmer: ^3.0.0

dev_dependencies:
  flutter_test:
    sdk: flutter
  flutter_lints: ^3.0.0
Run:
flutter pub get
Project Structure
Organize your Flutter project with this structure:
lib/
├── main.dart
├── config/
│   └── api_config.dart
├── models/
│   ├── blog.dart
│   ├── author.dart
│   ├── category.dart
│   └── tag.dart
├── services/
│   └── api_service.dart
├── providers/
│   └── blog_provider.dart
├── screens/
│   ├── home_screen.dart
│   ├── blog_detail_screen.dart
│   ├── author_profile_screen.dart
│   └── category_screen.dart
├── widgets/
│   ├── blog_card.dart
│   ├── author_avatar.dart
│   └── loading_shimmer.dart
└── utils/
    ├── date_utils.dart
    └── share_utils.dart
API Configuration
Create lib/config/api_config.dart:
class ApiConfig {
  // Change this to your Strapi server URL
  static const String baseUrl = 'http://10.0.2.2:1337'; // Android emulator
  // For iOS simulator: 'http://localhost:1337'
  // For physical device: 'http://YOUR_LOCAL_IP:1337'
  // For production: 'https://your-domain.com'

  static const String apiUrl = '$baseUrl/api';

  // API Endpoints
  static const String blogsEndpoint = '$apiUrl/blogs';
  static const String authorsEndpoint = '$apiUrl/authors';
  static const String categoriesEndpoint = '$apiUrl/categories';
  static const String tagsEndpoint = '$apiUrl/tags';

  // Helper method to get full media URL
  static String getMediaUrl(String path) {
    if (path.startsWith('http')) return path;
    return '$baseUrl$path';
  }

  // Common query parameters
  static const String populateAll = 'populate=*';
  static const String populateDeep =
    'populate[author][populate]=profilePicture'
    '&populate=categories'
    '&populate=tags'
    '&populate=featuredImage';
}
Important: When testing on physical devices, replace localhost with your computer's local IP address. Find it using:
- Windows:
ipconfig(look for IPv4 Address) - Mac/Linux:
ifconfig(look for inet address)
Creating Data Models
Blog Model
Create lib/models/blog.dart:
import 'author.dart';
import 'category.dart';
import 'tag.dart';

class Blog {
  final int id;
  final String title;
  final String slug;
  final String content;
  final String excerpt;
  final String? featuredImageUrl;
  final DateTime publishDate;
  final String status;
  final int viewCount;
  final Author? author;
  final List<Category> categories;
  final List<Tag> tags;
  final DateTime createdAt;
  final DateTime updatedAt;

  Blog({
    required this.id,
    required this.title,
    required this.slug,
    required this.content,
    required this.excerpt,
    this.featuredImageUrl,
    required this.publishDate,
    required this.status,
    required this.viewCount,
    this.author,
    required this.categories,
    required this.tags,
    required this.createdAt,
    required this.updatedAt,
  });

  factory Blog.fromJson(Map<String, dynamic> json) {
    final attributes = json['attributes'] as Map<String, dynamic>;

    // Extract featured image URL
    String? imageUrl;
    if (attributes['featuredImage'] != null) {
      final imageData = attributes['featuredImage']['data'];
      if (imageData != null) {
        final imageAttrs = imageData['attributes'];
        imageUrl = imageAttrs['url'];
      }
    }

    // Extract author
    Author? author;
    if (attributes['author'] != null &&
        attributes['author']['data'] != null) {
      author = Author.fromJson(attributes['author']['data']);
    }

    // Extract categories
    List<Category> categories = [];
    if (attributes['categories'] != null &&
        attributes['categories']['data'] != null) {
      categories = (attributes['categories']['data'] as List)
          .map((cat) => Category.fromJson(cat))
          .toList();
    }

    // Extract tags
    List<Tag> tags = [];
    if (attributes['tags'] != null &&
        attributes['tags']['data'] != null) {
      tags = (attributes['tags']['data'] as List)
          .map((tag) => Tag.fromJson(tag))
          .toList();
    }

    return Blog(
      id: json['id'],
      title: attributes['title'] ?? '',
      slug: attributes['slug'] ?? '',
      content: attributes['content'] ?? '',
      excerpt: attributes['excerpt'] ?? '',
      featuredImageUrl: imageUrl,
      publishDate: DateTime.parse(
        attributes['publishDate'] ?? attributes['createdAt']
      ),
      status: attributes['status'] ?? 'draft',
      viewCount: attributes['viewCount'] ?? 0,
      author: author,
      categories: categories,
      tags: tags,
      createdAt: DateTime.parse(attributes['createdAt']),
      updatedAt: DateTime.parse(attributes['updatedAt']),
    );
  }

  Map<String, dynamic> toJson() {
    return {
      'id': id,
      'attributes': {
        'title': title,
        'slug': slug,
        'content': content,
        'excerpt': excerpt,
        'publishDate': publishDate.toIso8601String(),
        'status': status,
        'viewCount': viewCount,
      }
    };
  }
}
Author Model
Create lib/models/author.dart:
class Author {
  final int id;
  final String name;
  final String bio;
  final String? email;
  final String? profilePictureUrl;
  final Map<String, dynamic>? socialLinks;

  Author({
    required this.id,
    required this.name,
    required this.bio,
    this.email,
    this.profilePictureUrl,
    this.socialLinks,
  });

  factory Author.fromJson(Map<String, dynamic> json) {
    final attributes = json['attributes'] as Map<String, dynamic>;

    String? profilePicUrl;
    if (attributes['profilePicture'] != null) {
      final picData = attributes['profilePicture']['data'];
      if (picData != null) {
        profilePicUrl = picData['attributes']['url'];
      }
    }

    return Author(
      id: json['id'],
      name: attributes['name'] ?? 'Anonymous',
      bio: attributes['bio'] ?? '',
      email: attributes['email'],
      profilePictureUrl: profilePicUrl,
      socialLinks: attributes['socialLinks'],
    );
  }
}
Category Model
Create lib/models/category.dart:
class Category {
  final int id;
  final String name;
  final String slug;
  final String description;
  final String? iconUrl;

  Category({
    required this.id,
    required this.name,
    required this.slug,
    required this.description,
    this.iconUrl,
  });

  factory Category.fromJson(Map<String, dynamic> json) {
    final attributes = json['attributes'] as Map<String, dynamic>;

    String? icon;
    if (attributes['icon'] != null) {
      final iconData = attributes['icon']['data'];
      if (iconData != null) {
        icon = iconData['attributes']['url'];
      }
    }

    return Category(
      id: json['id'],
      name: attributes['name'] ?? '',
      slug: attributes['slug'] ?? '',
      description: attributes['description'] ?? '',
      iconUrl: icon,
    );
  }
}
Tag Model
Create lib/models/tag.dart:
class Tag {
  final int id;
  final String name;
  final String slug;

  Tag({
    required this.id,
    required this.name,
    required this.slug,
  });

  factory Tag.fromJson(Map<String, dynamic> json) {
    final attributes = json['attributes'] as Map<String, dynamic>;

    return Tag(
      id: json['id'],
      name: attributes['name'] ?? '',
      slug: attributes['slug'] ?? '',
    );
  }
}
Creating the API Service
Create lib/services/api_service.dart:
import 'dart:convert';
import 'package:http/http.dart' as http;
import '../config/api_config.dart';
import '../models/blog.dart';
import '../models/author.dart';
import '../models/category.dart';

class ApiService {
  final http.Client _client = http.Client();

  // Get all blogs with pagination
  Future<Map<String, dynamic>> getBlogs({
    int page = 1,
    int pageSize = 10,
    String? categorySlug,
    String? searchQuery,
  }) async {
    try {
      // Build query parameters
      final queryParams = <String, String>{
        'pagination[page]': page.toString(),
        'pagination[pageSize]': pageSize.toString(),
        'populate[author][populate]': 'profilePicture',
        'populate[0]': 'categories',
        'populate[1]': 'tags',
        'populate[2]': 'featuredImage',
        'filters[status][\$eq]': 'published',
        'sort[0]': 'publishDate:desc',
      };

      // Add category filter if provided
      if (categorySlug != null) {
        queryParams['filters[categories][slug][\$eq]'] = categorySlug;
      }

      // Add search filter if provided
      if (searchQuery != null && searchQuery.isNotEmpty) {
        queryParams['filters[\$or][0][title][\$containsi]'] = searchQuery;
        queryParams['filters[\$or][1][content][\$containsi]'] = searchQuery;
      }

      final uri = Uri.parse(ApiConfig.blogsEndpoint)
          .replace(queryParameters: queryParams);

      final response = await _client.get(uri);

      if (response.statusCode == 200) {
        final jsonData = json.decode(response.body);
        final blogsData = jsonData['data'] as List;
        final blogs = blogsData.map((b) => Blog.fromJson(b)).toList();

        return {
          'blogs': blogs,
          'pagination': jsonData['meta']['pagination'],
        };
      } else {
        throw Exception('Failed to load blogs: ${response.statusCode}');
      }
    } catch (e) {
      throw Exception('Error fetching blogs: $e');
    }
  }

  // Get single blog by ID
  Future<Blog> getBlogById(int id) async {
    try {
      final queryParams = {
        'populate[author][populate]': 'profilePicture',
        'populate[0]': 'categories',
        'populate[1]': 'tags',
        'populate[2]': 'featuredImage',
      };

      final uri = Uri.parse('${ApiConfig.blogsEndpoint}/$id')
          .replace(queryParameters: queryParams);

      final response = await _client.get(uri);

      if (response.statusCode == 200) {
        final jsonData = json.decode(response.body);
        return Blog.fromJson(jsonData['data']);
      } else {
        throw Exception('Failed to load blog: ${response.statusCode}');
      }
    } catch (e) {
      throw Exception('Error fetching blog: $e');
    }
  }

  // Get single blog by slug (more user-friendly)
  Future<Blog?> getBlogBySlug(String slug) async {
    try {
      final queryParams = {
        'filters[slug][\$eq]': slug,
        'populate[author][populate]': 'profilePicture',
        'populate[0]': 'categories',
        'populate[1]': 'tags',
        'populate[2]': 'featuredImage',
      };

      final uri = Uri.parse(ApiConfig.blogsEndpoint)
          .replace(queryParameters: queryParams);

      final response = await _client.get(uri);

      if (response.statusCode == 200) {
        final jsonData = json.decode(response.body);
        final blogsData = jsonData['data'] as List;

        if (blogsData.isEmpty) return null;
        return Blog.fromJson(blogsData.first);
      } else {
        throw Exception('Failed to load blog: ${response.statusCode}');
      }
    } catch (e) {
      throw Exception('Error fetching blog: $e');
    }
  }

  // Get all categories
  Future<List<Category>> getCategories() async {
    try {
      final uri = Uri.parse(ApiConfig.categoriesEndpoint)
          .replace(queryParameters: {
            'populate': '*',
            'sort[0]': 'name:asc',
          });

      final response = await _client.get(uri);

      if (response.statusCode == 200) {
        final jsonData = json.decode(response.body);
        final categoriesData = jsonData['data'] as List;
        return categoriesData.map((c) => Category.fromJson(c)).toList();
      } else {
        throw Exception('Failed to load categories');
      }
    } catch (e) {
      throw Exception('Error fetching categories: $e');
    }
  }

  // Get author by ID
  Future<Author> getAuthorById(int id) async {
    try {
      final uri = Uri.parse('${ApiConfig.authorsEndpoint}/$id')
          .replace(queryParameters: {
            'populate': 'profilePicture',
          });

      final response = await _client.get(uri);

      if (response.statusCode == 200) {
        final jsonData = json.decode(response.body);
        return Author.fromJson(jsonData['data']);
      } else {
        throw Exception('Failed to load author');
      }
    } catch (e) {
      throw Exception('Error fetching author: $e');
    }
  }

  // Get blogs by author
  Future<List<Blog>> getBlogsByAuthor(int authorId) async {
    try {
      final queryParams = {
        'filters[author][id][\$eq]': authorId.toString(),
        'filters[status][\$eq]': 'published',
        'populate[author][populate]': 'profilePicture',
        'populate[0]': 'categories',
        'populate[1]': 'tags',
        'populate[2]': 'featuredImage',
        'sort[0]': 'publishDate:desc',
      };

      final uri = Uri.parse(ApiConfig.blogsEndpoint)
          .replace(queryParameters: queryParams);

      final response = await _client.get(uri);

      if (response.statusCode == 200) {
        final jsonData = json.decode(response.body);
        final blogsData = jsonData['data'] as List;
        return blogsData.map((b) => Blog.fromJson(b)).toList();
      } else {
        throw Exception('Failed to load author blogs');
      }
    } catch (e) {
      throw Exception('Error fetching author blogs: $e');
    }
  }

  // Increment view count
  Future<void> incrementViewCount(int blogId, int currentCount) async {
    try {
      final uri = Uri.parse('${ApiConfig.blogsEndpoint}/$blogId');

      final response = await _client.put(
        uri,
        headers: {'Content-Type': 'application/json'},
        body: json.encode({
          'data': {
            'viewCount': currentCount + 1,
          }
        }),
      );

      if (response.statusCode != 200) {
        print('Failed to increment view count: ${response.statusCode}');
      }
    } catch (e) {
      print('Error incrementing view count: $e');
      // Don't throw - view count is not critical
    }
  }

  void dispose() {
    _client.close();
  }
}
Implementing State Management
Create lib/providers/blog_provider.dart using Provider pattern:
import 'package:flutter/foundation.dart';
import '../models/blog.dart';
import '../models/category.dart';
import '../services/api_service.dart';

class BlogProvider with ChangeNotifier {
  final ApiService _apiService = ApiService();

  List<Blog> _blogs = [];
  List<Category> _categories = [];
  bool _isLoading = false;
  String? _error;
  int _currentPage = 1;
  bool _hasMore = true;
  String? _selectedCategorySlug;
  String _searchQuery = '';

  List<Blog> get blogs => _blogs;
  List<Category> get categories => _categories;
  bool get isLoading => _isLoading;
  String? get error => _error;
  bool get hasMore => _hasMore;
  String? get selectedCategorySlug => _selectedCategorySlug;

  // Fetch initial blogs
  Future<void> fetchBlogs({bool refresh = false}) async {
    if (refresh) {
      _currentPage = 1;
      _blogs = [];
      _hasMore = true;
    }

    if (_isLoading || !_hasMore) return;

    _isLoading = true;
    _error = null;
    notifyListeners();

    try {
      final result = await _apiService.getBlogs(
        page: _currentPage,
        pageSize: 10,
        categorySlug: _selectedCategorySlug,
        searchQuery: _searchQuery.isEmpty ? null : _searchQuery,
      );

      final newBlogs = result['blogs'] as List<Blog>;
      final pagination = result['pagination'];

      _blogs.addAll(newBlogs);
      _currentPage++;
      _hasMore = pagination['page'] < pagination['pageCount'];

      _isLoading = false;
      notifyListeners();
    } catch (e) {
      _error = e.toString();
      _isLoading = false;
      notifyListeners();
    }
  }

  // Fetch categories
  Future<void> fetchCategories() async {
    try {
      _categories = await _apiService.getCategories();
      notifyListeners();
    } catch (e) {
      print('Error fetching categories: $e');
    }
  }

  // Filter by category
  void filterByCategory(String? categorySlug) {
    _selectedCategorySlug = categorySlug;
    fetchBlogs(refresh: true);
  }

  // Search blogs
  void searchBlogs(String query) {
    _searchQuery = query;
    fetchBlogs(refresh: true);
  }

  // Clear search
  void clearSearch() {
    _searchQuery = '';
    fetchBlogs(refresh: true);
  }

  @override
  void dispose() {
    _apiService.dispose();
    super.dispose();
  }
}
Building the User Interface
Main App Setup
Update lib/main.dart:
import 'package:flutter/material.dart';
import 'package:provider/provider.dart';
import 'providers/blog_provider.dart';
import 'screens/home_screen.dart';

void main() {
  runApp(const MyApp());
}

class MyApp extends StatelessWidget {
  const MyApp({super.key});

  @override
  Widget build(BuildContext context) {
    return ChangeNotifierProvider(
      create: (_) => BlogProvider()..fetchBlogs()..fetchCategories(),
      child: MaterialApp(
        title: 'Blog App',
        debugShowCheckedModeBanner: false,
        theme: ThemeData(
          colorScheme: ColorScheme.fromSeed(
            seedColor: Colors.deepPurple,
            brightness: Brightness.light,
          ),
          useMaterial3: true,
          appBarTheme: const AppBarTheme(
            centerTitle: true,
            elevation: 0,
          ),
        ),
        darkTheme: ThemeData(
          colorScheme: ColorScheme.fromSeed(
            seedColor: Colors.deepPurple,
            brightness: Brightness.dark,
          ),
          useMaterial3: true,
        ),
        themeMode: ThemeMode.system,
        home: const HomeScreen(),
      ),
    );
  }
}
Home Screen with Blog List
Create lib/screens/home_screen.dart:
import 'package:flutter/material.dart';
import 'package:provider/provider.dart';
import '../providers/blog_provider.dart';
import '../widgets/blog_card.dart';
import '../widgets/loading_shimmer.dart';
import 'blog_detail_screen.dart';

class HomeScreen extends StatefulWidget {
  const HomeScreen({super.key});

  @override
  State<HomeScreen> createState() => _HomeScreenState();
}

class _HomeScreenState extends State<HomeScreen> {
  final ScrollController _scrollController = ScrollController();
  final TextEditingController _searchController = TextEditingController();

  @override
  void initState() {
    super.initState();
    _scrollController.addListener(_onScroll);
  }

  void _onScroll() {
    if (_scrollController.position.pixels >=
        _scrollController.position.maxScrollExtent * 0.9) {
      context.read<BlogProvider>().fetchBlogs();
    }
  }

  @override
  void dispose() {
    _scrollController.dispose();
    _searchController.dispose();
    super.dispose();
  }

  @override
  Widget build(BuildContext context) {
    return Scaffold(
      appBar: AppBar(
        title: const Text('Blog App'),
        actions: [
          IconButton(
            icon: const Icon(Icons.search),
            onPressed: () => _showSearchDialog(context),
          ),
        ],
      ),
      body: Column(
        children: [
          _buildCategoryFilter(),
          Expanded(
            child: Consumer<BlogProvider>(
              builder: (context, provider, child) {
                if (provider.error != null && provider.blogs.isEmpty) {
                  return _buildErrorWidget(provider.error!);
                }

                if (provider.isLoading && provider.blogs.isEmpty) {
                  return const LoadingShimmer();
                }

                if (provider.blogs.isEmpty) {
                  return _buildEmptyState();
                }

                return RefreshIndicator(
                  onRefresh: () => provider.fetchBlogs(refresh: true),
                  child: ListView.builder(
                    controller: _scrollController,
                    padding: const EdgeInsets.all(16),
                    itemCount: provider.blogs.length +
                        (provider.hasMore ? 1 : 0),
                    itemBuilder: (context, index) {
                      if (index == provider.blogs.length) {
                        return const Center(
                          child: Padding(
                            padding: EdgeInsets.all(16),
                            child: CircularProgressIndicator(),
                          ),
                        );
                      }

                      final blog = provider.blogs[index];
                      return BlogCard(
                        blog: blog,
                        onTap: () {
                          Navigator.push(
                            context,
                            MaterialPageRoute(
                              builder: (context) =>
                                  BlogDetailScreen(blog: blog),
                            ),
                          );
                        },
                      );
                    },
                  ),
                );
              },
            ),
          ),
        ],
      ),
    );
  }

  Widget _buildCategoryFilter() {
    return Consumer<BlogProvider>(
      builder: (context, provider, child) {
        if (provider.categories.isEmpty) return const SizedBox.shrink();

        return SizedBox(
          height: 50,
          child: ListView.builder(
            scrollDirection: Axis.horizontal,
            padding: const EdgeInsets.symmetric(horizontal: 16),
            itemCount: provider.categories.length + 1,
            itemBuilder: (context, index) {
              if (index == 0) {
                return Padding(
                  padding: const EdgeInsets.only(right: 8),
                  child: FilterChip(
                    label: const Text('All'),
                    selected: provider.selectedCategorySlug == null,
                    onSelected: (_) => provider.filterByCategory(null),
                  ),
                );
              }

              final category = provider.categories[index - 1];
              return Padding(
                padding: const EdgeInsets.only(right: 8),
                child: FilterChip(
                  label: Text(category.name),
                  selected: provider.selectedCategorySlug == category.slug,
                  onSelected: (_) => provider.filterByCategory(category.slug),
                ),
              );
            },
          ),
        );
      },
    );
  }

  void _showSearchDialog(BuildContext context) {
    showDialog(
      context: context,
      builder: (context) => AlertDialog(
        title: const Text('Search Blogs'),
        content: TextField(
          controller: _searchController,
          decoration: const InputDecoration(
            hintText: 'Enter search term...',
            border: OutlineInputBorder(),
          ),
          autofocus: true,
        ),
        actions: [
          TextButton(
            onPressed: () {
              context.read<BlogProvider>().clearSearch();
              _searchController.clear();
              Navigator.pop(context);
            },
            child: const Text('Clear'),
          ),
          ElevatedButton(
            onPressed: () {
              context.read<BlogProvider>()
                  .searchBlogs(_searchController.text);
              Navigator.pop(context);
            },
            child: const Text('Search'),
          ),
        ],
      ),
    );
  }

  Widget _buildEmptyState() {
    return Center(
      child: Column(
        mainAxisAlignment: MainAxisAlignment.center,
        children: [
          Icon(Icons.article_outlined, size: 64,
              color: Colors.grey[400]),
          const SizedBox(height: 16),
          Text(
            'No blogs found',
            style: Theme.of(context).textTheme.titleLarge,
          ),
          const SizedBox(height: 8),
          const Text('Try adjusting your filters'),
        ],
      ),
    );
  }

  Widget _buildErrorWidget(String error) {
    return Center(
      child: Column(
        mainAxisAlignment: MainAxisAlignment.center,
        children: [
          const Icon(Icons.error_outline, size: 64, color: Colors.red),
          const SizedBox(height: 16),
          Text('Error: $error'),
          const SizedBox(height: 16),
          ElevatedButton(
            onPressed: () =>
                context.read<BlogProvider>().fetchBlogs(refresh: true),
            child: const Text('Retry'),
          ),
        ],
      ),
    );
  }
}
Blog Card Widget
Create lib/widgets/blog_card.dart:
import 'package:flutter/material.dart';
import 'package:cached_network_image.dart';
import 'package:intl/intl.dart';
import '../models/blog.dart';
import '../config/api_config.dart';

class BlogCard extends StatelessWidget {
  final Blog blog;
  final VoidCallback onTap;

  const BlogCard({
    super.key,
    required this.blog,
    required this.onTap,
  });

  @override
  Widget build(BuildContext context) {
    return Card(
      clipBehavior: Clip.antiAlias,
      margin: const EdgeInsets.only(bottom: 16),
      child: InkWell(
        onTap: onTap,
        child: Column(
          crossAxisAlignment: CrossAxisAlignment.start,
          children: [
            if (blog.featuredImageUrl != null)
              Hero(
                tag: 'blog-image-${blog.id}',
                child: CachedNetworkImage(
                  imageUrl: ApiConfig.getMediaUrl(blog.featuredImageUrl!),
                  height: 200,
                  width: double.infinity,
                  fit: BoxFit.cover,
                  placeholder: (context, url) => Container(
                    height: 200,
                    color: Colors.grey[300],
                    child: const Center(
                      child: CircularProgressIndicator(),
                    ),
                  ),
                  errorWidget: (context, url, error) => Container(
                    height: 200,
                    color: Colors.grey[300],
                    child: const Icon(Icons.error),
                  ),
                ),
              ),
            Padding(
              padding: const EdgeInsets.all(16),
              child: Column(
                crossAxisAlignment: CrossAxisAlignment.start,
                children: [
                  if (blog.categories.isNotEmpty)
                    Wrap(
                      spacing: 8,
                      runSpacing: 8,
                      children: blog.categories
                          .take(2)
                          .map((cat) => Chip(
                                label: Text(
                                  cat.name,
                                  style: const TextStyle(fontSize: 12),
                                ),
                                padding: EdgeInsets.zero,
                                materialTapTargetSize:
                                    MaterialTapTargetSize.shrinkWrap,
                              ))
                          .toList(),
                    ),
                  const SizedBox(height: 12),
                  Text(
                    blog.title,
                    style: Theme.of(context).textTheme.titleLarge?.copyWith(
                          fontWeight: FontWeight.bold,
                        ),
                    maxLines: 2,
                    overflow: TextOverflow.ellipsis,
                  ),
                  const SizedBox(height: 8),
                  Text(
                    blog.excerpt,
                    style: Theme.of(context).textTheme.bodyMedium,
                    maxLines: 3,
                    overflow: TextOverflow.ellipsis,
                  ),
                  const SizedBox(height: 16),
                  Row(
                    children: [
                      if (blog.author != null)
                        CircleAvatar(
                          radius: 16,
                          backgroundImage: blog.author!.profilePictureUrl != null
                              ? CachedNetworkImageProvider(
                                  ApiConfig.getMediaUrl(
                                    blog.author!.profilePictureUrl!,
                                  ),
                                )
                              : null,
                          child: blog.author!.profilePictureUrl == null
                              ? Text(blog.author!.name[0].toUpperCase())
                              : null,
                        ),
                      const SizedBox(width: 8),
                      Expanded(
                        child: Column(
                          crossAxisAlignment: CrossAxisAlignment.start,
                          children: [
                            if (blog.author != null)
                              Text(
                                blog.author!.name,
                                style: const TextStyle(
                                  fontWeight: FontWeight.w500,
                                ),
                              ),
                            Text(
                              DateFormat('MMM dd, yyyy')
                                  .format(blog.publishDate),
                              style: Theme.of(context).textTheme.bodySmall,
                            ),
                          ],
                        ),
                      ),
                      Icon(Icons.visibility, size: 16,
                          color: Colors.grey[600]),
                      const SizedBox(width: 4),
                      Text(
                        '${blog.viewCount}',
                        style: TextStyle(color: Colors.grey[600]),
                      ),
                    ],
                  ),
                ],
              ),
            ),
          ],
        ),
      ),
    );
  }
}
Blog Detail Screen
Create lib/screens/blog_detail_screen.dart:
import 'package:flutter/material.dart';
import 'package:cached_network_image.dart';
import 'package:intl/intl.dart';
import 'package:share_plus/share_plus.dart';
import '../models/blog.dart';
import '../config/api_config.dart';
import '../services/api_service.dart';
import 'author_profile_screen.dart';

class BlogDetailScreen extends StatefulWidget {
  final Blog blog;

  const BlogDetailScreen({super.key, required this.blog});

  @override
  State<BlogDetailScreen> createState() => _BlogDetailScreenState();
}

class _BlogDetailScreenState extends State<BlogDetailScreen> {
  final ApiService _apiService = ApiService();

  @override
  void initState() {
    super.initState();
    _incrementViewCount();
  }

  Future<void> _incrementViewCount() async {
    await _apiService.incrementViewCount(
      widget.blog.id,
      widget.blog.viewCount,
    );
  }

  @override
  void dispose() {
    _apiService.dispose();
    super.dispose();
  }

  @override
  Widget build(BuildContext context) {
    return Scaffold(
      body: CustomScrollView(
        slivers: [
          SliverAppBar(
            expandedHeight: 300,
            pinned: true,
            flexibleSpace: FlexibleSpaceBar(
              background: widget.blog.featuredImageUrl != null
                  ? Hero(
                      tag: 'blog-image-${widget.blog.id}',
                      child: CachedNetworkImage(
                        imageUrl: ApiConfig.getMediaUrl(
                          widget.blog.featuredImageUrl!,
                        ),
                        fit: BoxFit.cover,
                      ),
                    )
                  : Container(color: Colors.grey[300]),
            ),
            actions: [
              IconButton(
                icon: const Icon(Icons.share),
                onPressed: () {
                  Share.share(
                    '${widget.blog.title}\n\n'
                    '${widget.blog.excerpt}\n\n'
                    'Read more: ${ApiConfig.baseUrl}/blog/${widget.blog.slug}',
                  );
                },
              ),
            ],
          ),
          SliverToBoxAdapter(
            child: Padding(
              padding: const EdgeInsets.all(16),
              child: Column(
                crossAxisAlignment: CrossAxisAlignment.start,
                children: [
                  if (widget.blog.categories.isNotEmpty)
                    Wrap(
                      spacing: 8,
                      runSpacing: 8,
                      children: widget.blog.categories
                          .map((cat) => Chip(
                                label: Text(cat.name),
                              ))
                          .toList(),
                    ),
                  const SizedBox(height: 16),
                  Text(
                    widget.blog.title,
                    style: Theme.of(context).textTheme.headlineMedium?.copyWith(
                          fontWeight: FontWeight.bold,
                        ),
                  ),
                  const SizedBox(height: 16),
                  _buildAuthorInfo(),
                  const Divider(height: 32),
                  Text(
                    widget.blog.content,
                    style: Theme.of(context).textTheme.bodyLarge?.copyWith(
                          height: 1.6,
                        ),
                  ),
                  if (widget.blog.tags.isNotEmpty) ...[
                    const SizedBox(height: 32),
                    const Divider(),
                    const SizedBox(height: 16),
                    Wrap(
                      spacing: 8,
                      runSpacing: 8,
                      children: widget.blog.tags
                          .map((tag) => ActionChip(
                                label: Text('#${tag.name}'),
                                onPressed: () {
                                  // Could implement tag filtering
                                },
                              ))
                          .toList(),
                    ),
                  ],
                ],
              ),
            ),
          ),
        ],
      ),
    );
  }

  Widget _buildAuthorInfo() {
    if (widget.blog.author == null) return const SizedBox.shrink();

    final author = widget.blog.author!;

    return InkWell(
      onTap: () {
        Navigator.push(
          context,
          MaterialPageRoute(
            builder: (context) => AuthorProfileScreen(author: author),
          ),
        );
      },
      child: Row(
        children: [
          CircleAvatar(
            radius: 24,
            backgroundImage: author.profilePictureUrl != null
                ? CachedNetworkImageProvider(
                    ApiConfig.getMediaUrl(author.profilePictureUrl!),
                  )
                : null,
            child: author.profilePictureUrl == null
                ? Text(author.name[0].toUpperCase())
                : null,
          ),
          const SizedBox(width: 12),
          Expanded(
            child: Column(
              crossAxisAlignment: CrossAxisAlignment.start,
              children: [
                Text(
                  author.name,
                  style: const TextStyle(
                    fontWeight: FontWeight.bold,
                    fontSize: 16,
                  ),
                ),
                Text(
                  DateFormat('MMM dd, yyyy').format(widget.blog.publishDate),
                  style: TextStyle(
                    color: Colors.grey[600],
                    fontSize: 14,
                  ),
                ),
              ],
            ),
          ),
          Row(
            children: [
              Icon(Icons.visibility, size: 16, color: Colors.grey[600]),
              const SizedBox(width: 4),
              Text(
                '${widget.blog.viewCount}',
                style: TextStyle(color: Colors.grey[600]),
              ),
            ],
          ),
        ],
      ),
    );
  }
}
Due to length constraints, I'll continue with the remaining sections in a structured format:
Additional Features Implementation
Author Profile Screen
Create lib/screens/author_profile_screen.dart to display author information and their blog posts.
Loading Shimmer Effect
Create lib/widgets/loading_shimmer.dart for elegant loading states using the shimmer package.
Image Optimization
Implement proper image caching and optimization strategies:
- Use
CachedNetworkImagefor efficient image loading - Implement placeholder and error widgets
- Consider image size optimization on the Strapi side
Pagination and Infinite Scroll
Already implemented in the provider with scroll controller detection and automatic loading of more content.
Best Practices
Content Model Structure
- Keep relationships clear and bidirectional
- Use slugs for URL-friendly identifiers
- Implement proper indexing in the database
- Use media formats for responsive images
API Performance
- Implement selective population (only fetch needed relations)
- Use pagination consistently
- Consider implementing caching with Redis
- Monitor API response times
SEO Considerations
- Use descriptive slugs
- Implement meta descriptions (excerpt field)
- Consider implementing Open Graph tags
- Generate sitemaps from Strapi
Security
- Always use HTTPS in production
- Implement rate limiting
- Use environment variables for sensitive data
- Regularly update Strapi and dependencies
- Implement proper CORS policies
Deployment
- Use PM2 for process management
- Set up proper logging
- Implement database backups
- Use CDN for media files
- Consider containerization with Docker
Common Challenges and Solutions
CORS Issues
If you encounter CORS errors, ensure your config/middlewares.js properly configures the CORS middleware with your app's domain.
Permission Errors
Double-check that public permissions are enabled for the content types and specific endpoints you're accessing.
Image Loading Problems
Ensure media URLs are properly constructed and the upload folder is accessible. Consider using external storage like S3 or Cloudinary.
API Response Optimization
Use selective population to reduce payload size. Implement GraphQL if you need more control over data fetching.
Conclusion and Future Enhancements
You've now built a complete blog-sharing application with Flutter and Strapi CMS. This architecture provides a solid foundation for modern content-driven applications.
Possible Future Enhancements
Real-time Updates: Implement WebSocket connections for live content updates
User-Generated Content: Allow users to submit guest posts for moderation
Advanced Search: Implement Elasticsearch or Algolia integration
Analytics: Track reading patterns and popular content
Progressive Web App: Convert the Flutter web version to a PWA
Multilingual Support: Leverage Strapi's i18n plugin for multiple languages
Comments System: Implement a comment moderation workflow
Newsletter Integration: Connect with email marketing platforms
Offline Mode: Implement local database caching with Hive or SQLite
Push Notifications: Integrate Firebase Cloud Messaging
This comprehensive guide has taken you from understanding headless CMS concepts through building a production-ready blog application. The separation of concerns between your Flutter frontend and Strapi backend provides flexibility, scalability, and maintainability that will serve your application well as it grows.
Search
Categories
- Coding (Programming & Scripting)
- Artificial Intelligence
- Data Structures and Algorithms
- Computer Networks
- Database Management Systems
- Operating Systems
- Software Engineering
- Cybersecurity
- Human-Computer Interaction
- Python Libraries
- Machine learning
- Data Analytics
- Systems Programming
- Cybersecurity & Reverse Engineering
- Automotive Systems
- Embedded Systems and IoT
- Compiler Designs and Principals
- Apps and Softwares
Recent Articles
- Uninformed Search Algorithms in AI
- Pandas Data Wrangling Cheat Sheet
- Complete Guide to Seaborn Data Visualization: From Theory to Practice
- Informed Search Algorithms in Artificial Intelligence
- Derivation of the Softmax Function
- Gradient descent — mathematical explanation & full derivation
- Understanding Standard Deviation and Outliers with Bank Transaction Example
- ETL Pipelines in Python Explained with Code and Examples